


February 17th, 2024 Issue
Season Extension #2 Microclimate / Water Soluble Calcium- WCA / Garlic Mustard- Alliaria petiolata / Float Fishing Lesson #20- Feeding Up / Fly Tying Lesson #20- Glo Bug


Season Extension #2 Microclimate
As I start to go through different kinds of season extension strategies, one of the things we always need to keep in mind, is the microclimate of the area we are planting in. You can achieve a lot just by choosing the right placement.
There is a farmer that lives in the Austrian Alps, his name is Sepp Holzer. If you don’t know who he is, you should spend some time getting acquainted with his style of permaculture. He has achieved some amazing things. One of the things that comes to my mind, was the placement of a dwarf lemon tree right next to a rock face on the mountain side. In his part of the world, it gets way below zero, yet he was able to find a microclimate that the tree not only survived, but gave him lemons.
The power of understanding microclimate can not be overemphasized. A slope angle of 10 to 15 degrees tilted towards the south, in the northern hemisphere, can give you the same climate, as 100’s of miles south of you on flat ground. So once you realize that, you learn to put your season extension strategies on these kinds of gentle slopes, to make them even more effective. Or you learn to avoid these kinds of areas, to extend the lettuce season into the heat of summer. Placing the plants rather on a north facing slope, that has a cooler microclimate.
If you live in the northern hemisphere, then planting on the south side of your house can allow you to capture quite a bit of heat. Take a walk on the land that you are seeking to utilize, and spend some time looking closely at areas the snow remains the longest, or melts the fastest. You can also take walks in the evening and feel where the cool pockets of air are settling. Make good mental notes of all these nuances. Your ability to extend the season, especially if you live in the north, can make all the difference in allowing you to have a more abundant harvest.
The Regenerative Homestead Newsletter’s Main Index
This link will take you to a full Index, of all the articles that I have published, organized by topic. Making it very easy for you to go back, and revisit an article that you wanted to review again in the future.


I published this article in a separate newsletter last Tuesday. This link will take you to that newsletter.

If you know someone, that you think would enjoy this newsletter, please let them know by sharing it. Thank you!

Water Soluble Calcium- WCA
In our last lesson, we looked at the process I use to turn different materials, like egg shells, into Biochar. To make a calcium foliar spray for your plants, you don’t have to use shells that have been turned into charcoal. But if you don’t char them, then you do have to toast them to remove the white membrane from the inside. Chris Trump has a video on YouTube showing how he does it. But for me it is so much easier to just put them in a dutch oven, and put them in my wood stove. I can walk away and do something else while they gasify.
After you have prepared the eggshell, by one of the above methods, you are ready to make your WCA. You are going to take a glass jar and put in 1/11th of it’s volume of eggshell in the bottom. (The original email said 1/10th, it is actually 1/11th because the ratio is 1 part eggshells to 10 parts BRV, 11 parts all together) Then you will take some brown rice vinegar and fill up the rest of the jar. So you are making a mix of one part eggshell, to ten parts BRV. This mixture will begin to aggressively bubble. The crushed shell pieces will be dancing all over the place. You will let this sit for seven days. On the seventh day you will take a small amount of eggshell and put it in the vinegar. If nothing happens then you know that you have extracted all the calcium that the vinegar can hold. If it gets bubbling again then you know you need more eggshell and time to sit.
I will be going through how to use this in a foliar spray in future posts. If you haven’t seen the videos on making the biochar, and how I make these preparations, this link will take you to the video series. Children are super fascinated by the chemical reaction that takes place when making WCA.
https://rumble.com/user/Schaafcraig?q=biochar

Garlic Mustard- Alliaria petiolata
Garlic mustard is a wonderful wild edible. Many people that are upset by invasive species would love it if you eat as much of this as you can. It is really nutritious and quite tasty in a salad. Here is a link that will take you to a couple of videos that give you a glimpse of it up close.
https://rumble.com/user/Schaafcraig?q=garlic%20mustard


Float Fishing Lesson #20- Feeding Up
Feeding up is a concept that you need to understand, especially for certain species of fish. Most panfish like crappie and bluegill will seek to ambush things from below. Walleye and bass will prefer to come from under if they can as well. This is very important to the float fisherman, because floats give you the greatest advantage for lift bite detection, compared to other techniques. Many of the largest panfish I catch, will not pull the float under, but rather make the float rise up out of the water.
The reason I am pointing this out, is because if you are dealing with a fish species that will suspend at varying depths, and likes to feed up, you don’t want to make the mistake of just immediately sending your bait to the bottom, when you first start fishing. It can spook fish if your bulk shot and bait goes drifting down past them too quickly. I need to take time to define something for you. When I am fishing with a slip float in deeper water, I will place the majority of my weights about two feet above my bait. This larger group of shot, I will be referring to in the future as my bulk shot. Down by my bait, I will have a small shot, that I will be referring to as my drop shot.
So if you are fishing in twelve foot of water, and the school of bluegill are suspended at six feet. You don’t want to have you slip rig just go whipping past them. If I don’t have a fish finder that tells me how deep the fish are, I will start by fishing the area more shallowly. If I don’t get any bites, I will begin to move my float stop deeper and deeper until I locate fish.

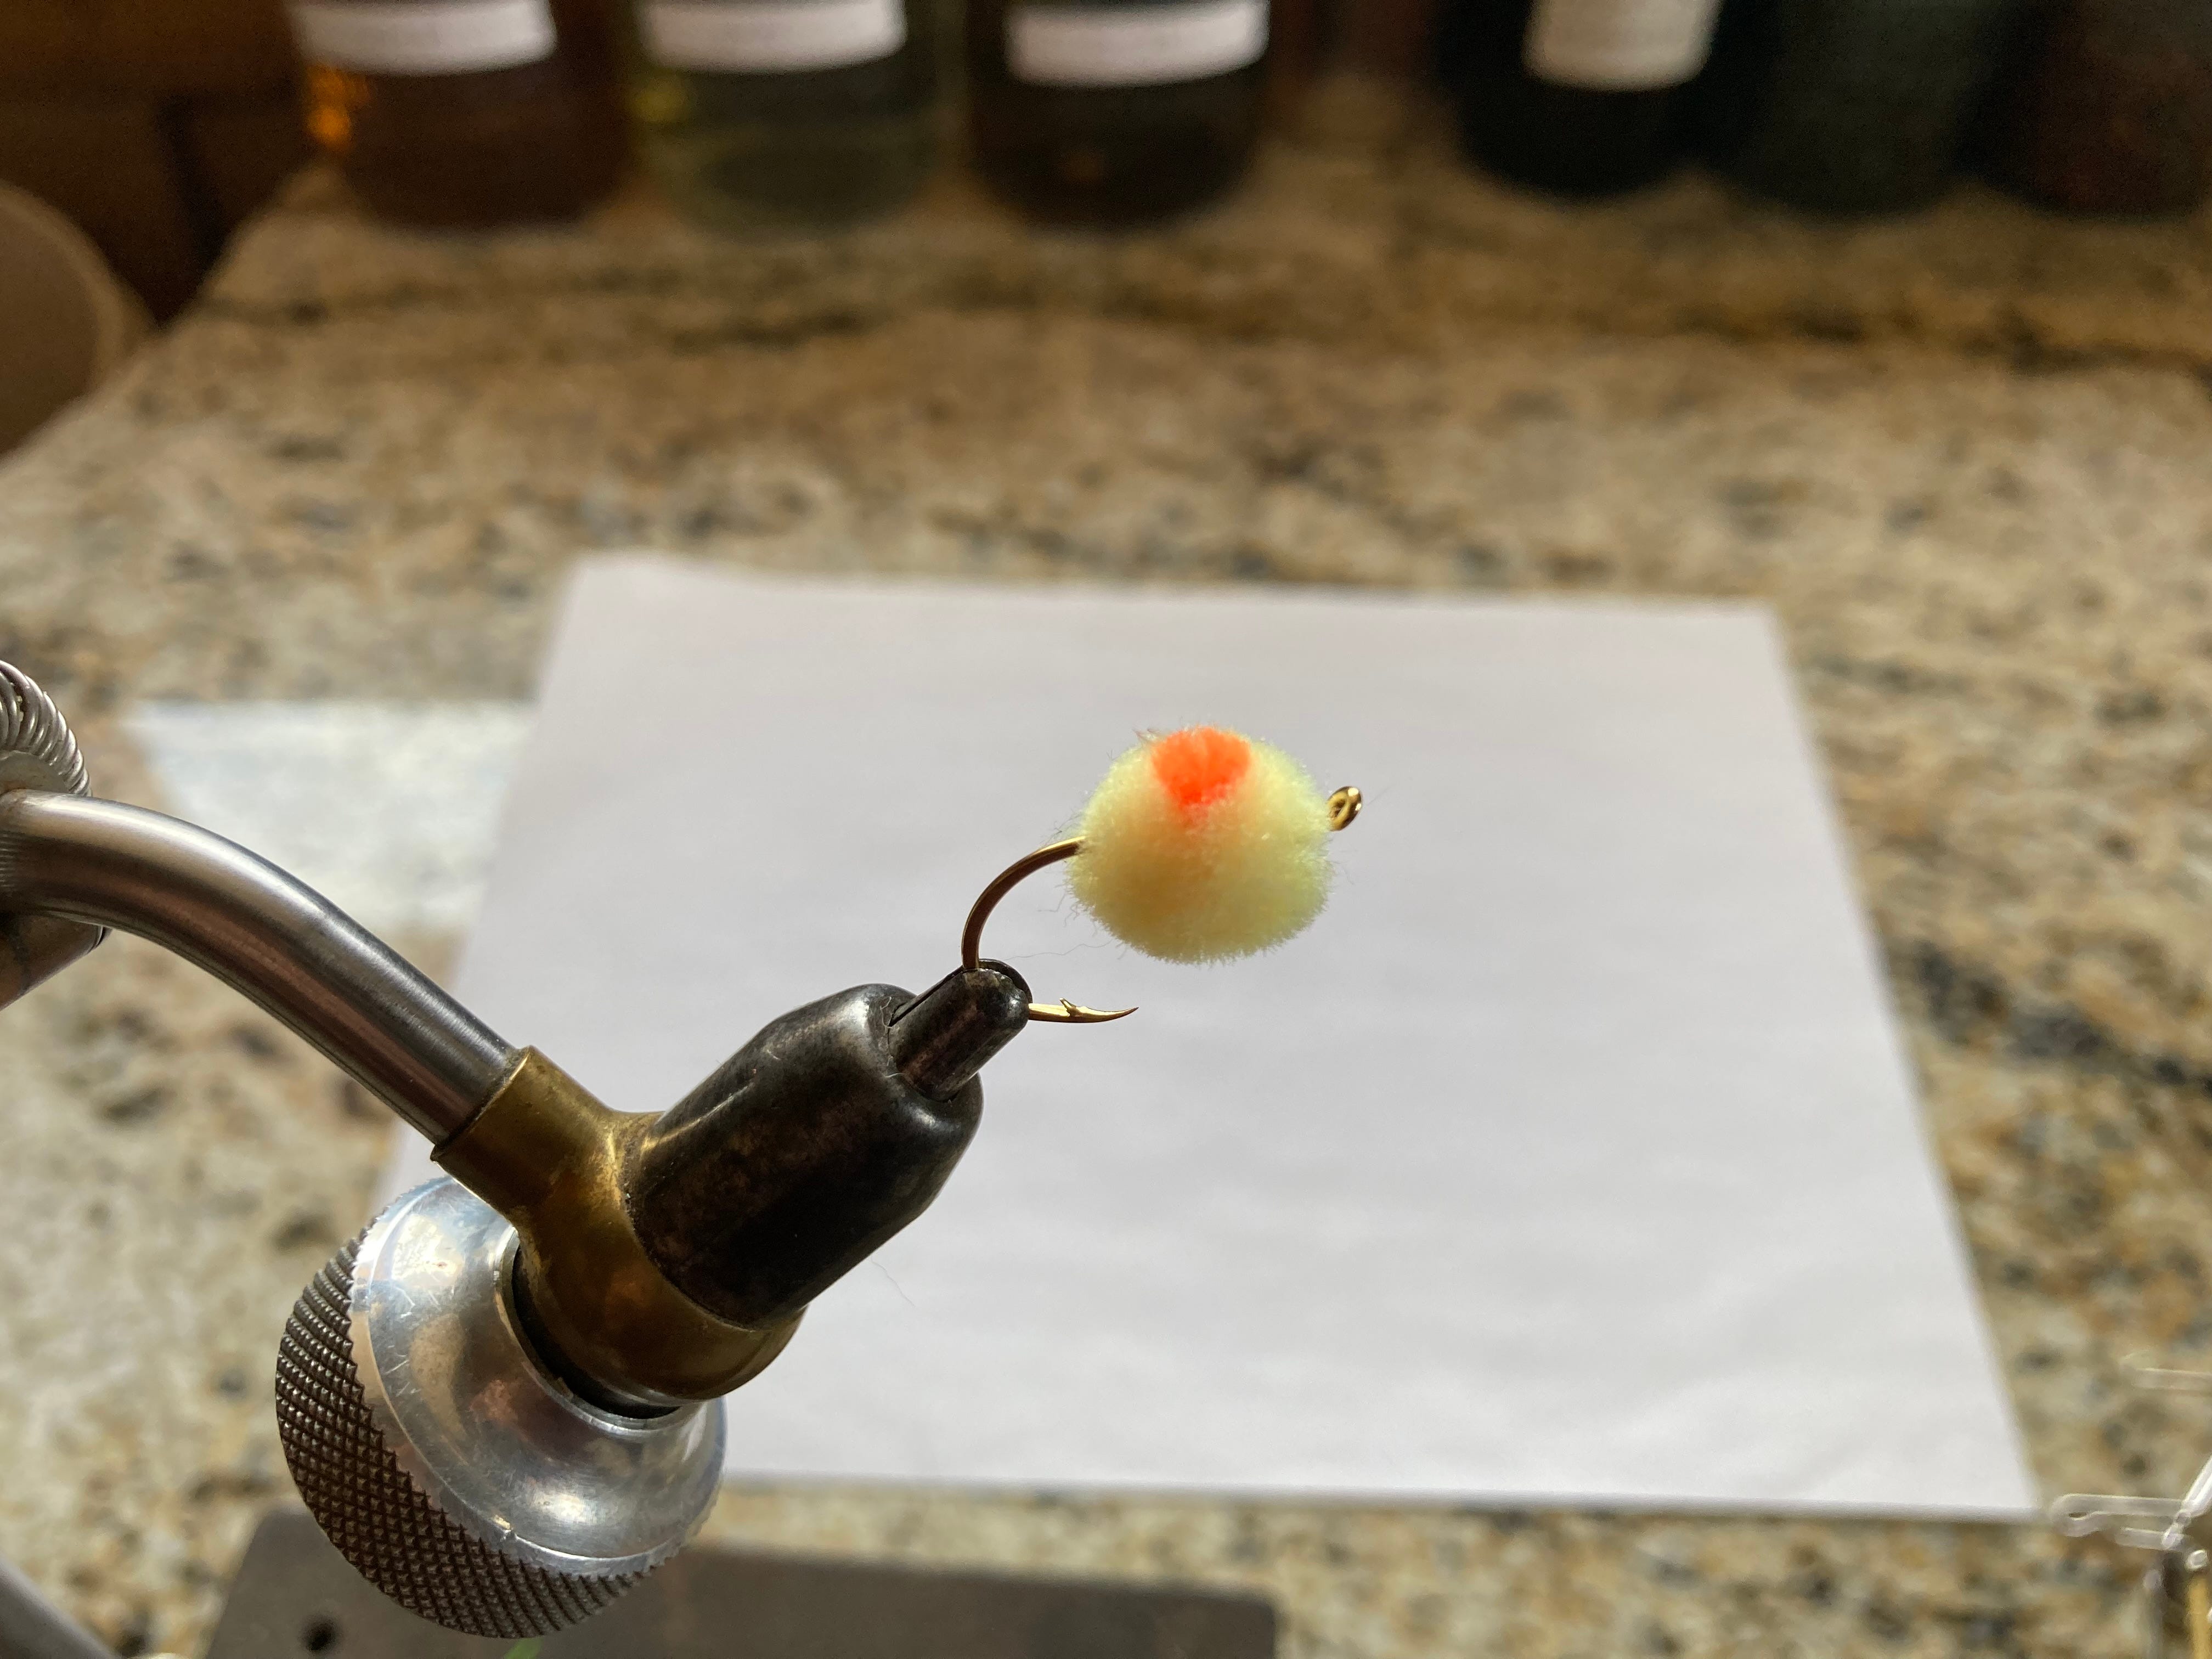
Fly Tying Lesson #20- Glo Bug
In this lesson we tie the Glo Bug. This is an important salmon egg imitation, for steelhead trout.
https://rumble.com/v10z6xf-fly-tying-class-lesson-20-glo-bug.html

Thank you Craig, for all you do. Sometimes we don't appreciate the impact of our sharing and/or leading. I appreciate many of the things you are doing, whether it be to lead us to a deeper relationship with Jesus, growing sweet potatoes in a climate like yours, or making biochar. We each have our gifts and you freely use yours to help many, including me, for the Glory of God. May God Bless you, Brother!
Fascinating!